Sunday, October 2, 2016

Kitchen Sink Cookies - *Full* Batch

Kitchen Sink Cookies - *Full* Half Batch

I mentioned on Facebook about this recipe, and a couple of people asked about it, so here it is. I'll post the recipe for the full batch, but, well... You'll see.

This is the full batch recipe:

720g brown sugar
1kg sugar
500g butter
12 eggs
1 tbs vanilla
1 tbs golden syrup
1.5kg peanut butter
64g bicarb soda
1.8kg quick oats
720g chocolate chips
500g sultanas

Now, some notes.
  1. I use Australian measures in my recipes, which means 1 tbs = 20ml, or 4 tsp. 
  2. I use raw sugar by preference, but ordinary white/granulated sugar is fine. It's fine. Really. (sigh...)
  3. Golden syrup is magic, but if you're deprived of its wonderfulness, you'll have to make do with glucose syrup or light corn syrup. That is what the recipe called for originally, after all.
  4. Bicarb Soda is Baking Soda.
  5. I used chocolate melts, rather than chips, because that was on sale, and 720g, people. 720g.
  6. Feel free to substitute raisins or any other dried fruit for the sultanas. Or even nuts, if you're insane (I hate nuts in my baked goods. Just saying.) Or, if you're really eager, the recipe originally called for mini M&Ms, but I decided that was a little too much chocolate for something I was pretending was marginally healthy for my kids. It has rolled oats, enough said. (Okay, quick oats. Near enough.)


Procedure:
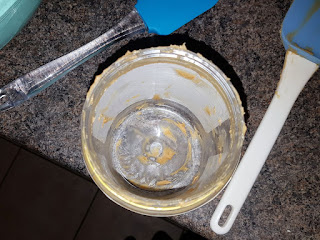
Get out your largest bowl. Then put it down, and scrounge for something bigger.

Choices, choices...
Then decide that - oops! - you need to halve the recipe. This is what 1.8kg of quick oats looks like:

That's a lot of oats.

So dump in your butter and sugars, and beat away. This is not your mother's cake recipe, or even a halfway decent sugar cookie recipe. This is a proper dump-and-mix. Don't bother creaming, just beat the butter and sugars until combined.

Butter, sugars, eggs, yum!

Dump in all the eggs, and beat. Now we're looking a bit better.

Nice

Add the vanilla and golden syrup. I tend to be a bit strict with my ingredients ("No, really?" says the woman who watched me weigh portions of dough so I had biscuits that were all about the right size.) but there are a couple of ingredients that I just tend to ... let loose with. Golden syrup is one of them. Look at it.

Golden syrup goodness

Look!

So good...

Excuse me while I wipe my drool.

(Also, really, this recipe? Not so necessary to be strict.)

Next, beat in the peanut butter, and then the quick oats.

Before

After

(The jar comes in 780g, not 750g, so that's what goes into the recipe. And see what I mean about strict. We're not making a sponge.)

If you have a half-way decent hand-mixer, it should still be fine with this, but this is where it's journey ends. Put is aside, and pick up the wooden spoon. You're going to need it.

Just about everything's been added. Time for the wooden spoon.

Add in the sultanas and chocolate. I did it one at a time, but you could dump in both at the same time. Fold them in. Work those arm muscles, because it gets heavy. Make sure you get them all through the mixture.

Sultanas & chocolate

I weighed my half-batch after this, and it weighed 4.125kg. A little heavier than my third child. (Just saying.)

Anyway, you can scoop it onto your lined trays with a cookie scoop, or just pour it onto the lined tray and pat it into place like a slice recipe. That's how I do the 1/4 batch: I press it into 2 lined slice trays - about 20cm x 30cm? - and bake it for 20 minutes. I can get 48 pieces out of that. Not sure what I'll get out of this one, though. Oh, and messy hands. Yuck!

Can't stand sticky, messy hands. But you do what you have to do...

I chose to press it into 1 45cm x 30cm baking tray that just fits into my oven (first time - yay!) and the rest were done with the cookie scoop. I'm having second thoughts about this size of scoop. Pretty sure I'm going to have to go back and get the next size down (or two.)

These are big suckers :o

I got 10 to the sheet, and 17 overall after making the slice.

If you're cooking it like a slice, cook for 20 minutes at 180C. If you're scooping out, cook for 15 minutes. I turned them at 10 minutes, but left them a bit longer - more 17 minutes total, and one of the cookies is a little brown for my tastes.

Very big suckers...

Let the slice cool in the tray, but the cookies can transfer after 10 minutes. One thing to note is that while the slice puffs up while cooking, it drops again when cooling.

Don't know if you can see, but it's sunk a bit. Still good.

Yep. The scoop is too big. Just had one - don't think I need dinner, now ;)

Or in the old money, 4"
I wanted to include PDF versions for you to print, but I don't think Blogger is up on that yet. Pity. Anyway, let me know if you want the PDFs. I have them for full and half batch amounts. Or, you know, you could just halve the amounts above.

Well, I've done my first half-batch. Had my cookie.Will get around to the next half batch ... eventually.

So... 6 1/2 Years...

It's been a while. A very long while. And I don't expect anyone's still lurking, but for the sake of continuity, here I am. And here's something of an explanation. Not long after my last post, my husband moved to New Zealand. There was a plan. He was going to get a job, get a house, we were going to move, it was going to be great. And none of that happened. Long story short, we separated, the kids and I settled elsewhere, and he's still a part of their life. The amount of their life he's part of is entirely his call, as I remain in good standing with his mother, even inviting her (and him) to stay with us for big events in the kids' lives. He never does, and she hasn't for a while, since the journey to where we are is quite long for someone of her age and health :(

Moving on.

Bethy is turning 20 next year. She has voted in 2 elections, and is looking at uni next year. Wow. Mark was diagnosed with Aspergers/Autistic Spectrum Disorder, and is in grade 11, and my baby is in high school. It's been a while.

I am looking at starting a cake baking and decorating business, so will be using a new website when it's ready. I will be doing one more post here (the Kitchen Sink Cookies *Full* batch) and maybe more. I might even keep this going with the more personal cooking stories, since not everything is perfect. (Never is :o ) Actually, if I'm quick, I'll post a snippet about my last adventure in chocolate buttercream. Well, at least it was tasty.
Well, for now I bid you adieu.

Monday, January 4, 2010

New toy and program recommendations

We decided to buy a laptop for Christmas. We were given some money for a family present by hubby's parents, some more from my brother, and we put in some, and found a decent laptop for a very good price. It came with Vista, but, being a Toshiba, we were able to upgrade to Windows 7 for about $30. Can I say - I'm in love! It works so much better than our other, second-hand, slow computers! I can sit in the recliner, with the laptop on my lap and fiddle with my pictures, write fanfic, and blog. ('Cause I'm back - honest!)
Anyway, along with the laptop, you also need programs. I like writing, amongst other stuff, and so need an office suite. Rather than pay more money than I have for Windows, I use Open Office. To be honest, I now prefer Open Office to Windows. For my photos, I use Picasa. I did get the Creative Memories program, but have gone back to Picasa. For me, Picasa is easier, especially since I use my photos for blogging, adding to Flickr, and other stuff. I don't do digital scrapbooking, so I don't need that functionality. And I just prefer the look of Picasa.
When I need to do more with a photo that Picasa can do, I use Gimp. This is a free Photoshop alternative. I don't have a lot of experience with it, and certainly can't justify the cost of buying Photoshop just to touch up some photos. I really can't compare it with Photoshop since I've never used the other program, but it appears to have similar functionalities.
So, anyway, I'm now a very happy camper, playing with my photos, writing my stories, and doing other stuff without huge lumps of money going to other people. Very happy :D And hopefully my experiences can help some others.

Lazy Beef Satay

The original version of this recipe was for a satay marinade, and (from memory) consisted of:
1 tbs soy sauce
2 tbs oil
3 tbs ketchup
3 tbs peanut butter

Well, I never used it as a marinade, but decided to turn it into a sauce instead of using a packet mix for beef satay (one of my favourites - yum!) So this is what I made for dinner tonight (serves 5-6.)

1 tbs olive oil
1 onion, thinly sliced
1 capsicum, thinly sliced
650g beef minced
1 tbs sweet soy sauce (ketcap manis)
3 tbs tomato sauce
3 tbs crunchy peanut butter
1 tbs curry powder (to taste)
500g frozen mixed vegetables
rice to serve

Saute the onion and capsicum in the oil, then brown the mince. While that is browning, mix the sauce.
3 tbs crunchy peanut butter. I just used a generic brand, and am generous with this recipe. I use the Australian Metric measures (20ml tbs) and don't mind if it's rounded ;)

1 tbs sweet soy sauce (ketcap manis) - the original recipe implied the more typically known soy sauce, but since this is supposed to be an Indonesian dish, I use the Indonesian variety of soy sauce (which is also yummier, though thicker.) er... I also ended up using 3 tbs sweet soy sauce, so the dish ended up being a bit sweeter than usual. That will teach me to measure without thinking about what I'm measuring :o

3 tbs tomato sauce - not puree, but more like ketchup.

Because I'm a lazy cook, I freeze my mince in meal-portions (not the lazy part, just smart) and then just dump the frozen meat straight into the frying pan. It takes a bit longer, but I'm not hovering over the pan, so I'm fine with that.

I have to be quite generous with my curry powder, as it's *really* (really!) weak. I would easily use 1-2 tbs of the stuff. I need to get some more, and not buy that brand again. (Some generic brand mild curry powder, I think. Some things are better in a brand name.)
Brown off the powder a little, till it's aromatic, then mix the powder in with the sauce. (That way you don't get unevenly flavoured mince.)

I add extra water to extend the sauce, and to ensure the vegetables have a little something to cook in. Also, it seems to make the sauce creamier than without. I just use the original bowl I mixed the sauce in for the water, so that I can scrape the last of the ingredients in.

At this point, I just cook it until the vegetables are done - 10 or so minutes. When the vegetables are done to taste, serve over hot rice.

If you want to make this gluten free, you pretty much just need to watch the soy and tomato sauces.

Thursday, August 27, 2009

My New Camera

I got a new camera this week! I've wanted one for a long time, and had my sights set on a digital SLR because... you know... it's fancy! But I came across one particular camera last week which challenged my thinking. It was the Fujifilm FinePix S1500. It was in my price bracket (thanks to a tax refund) and you can't attach anything to it, except a tripod, and I'm seriously thinking about getting one of those. And that's the beauty of this type of camera. It does all kinds of wonderful things, but I don't need to spend much more money on it, unlike an SLR, where the basic camera is $1 000 (or more) and then you lenses, then filters, then ... It all adds up, and I don't have that kind of money to splash around. That's what I have my scrapbooking for (insert evil chuckle.)
So then I shopped around. I looked at what I was getting, and how much it would cost. After looking at a few different cameras, I came back to the Fuji. For the money I was paying, it was as much as I needed, and enough to learn on. Maybe one day I will upgrade to a proper SLR, but not this year. And, with shopping around, I ended up getting the camera, the camera bag, the memory card, and batteries for the price of the camera alone at the original shop.
So... Piccies :) All of these are straight out of the camera - isn't it wonderful?

This is a cactus/succulent/thing that is growing in my garden for some obscure reason.


This is growing in the lawn. It has escaped from someone else's garden, which these plants are notorius for. Mum has some, and they are forever popping up in random spots in the lawn.


The bottle-brush has just started blooming. This shot is looking up at the plant, and then to the eaves of the house, but because it's on Macro setting, it just sort of blurs into that greenish background.


No idea what this is. I thought it was a camellia, but the flowers don't look like it. Any ideas?


This is the old Toowoomba Council Building at night. I could not have gotten this photo with my old camera (I tried - blech!)

I'm actually entering the Coucil Building and the Bottlebrushes into a local photography competition with the Toowoomba Carnival of Flowers. The photos have to be a minimum of 4mp, and my new camera is 10mp, so that means I can crop the photos a little, if I need to. My old camera was 5mp, and that means you only have a very little amount that you can crop before it drops too low.

Wednesday, August 19, 2009

Hummingbird Cake with Cream Cheese Frosting

So I had some bananas going bad in my fridge, which is just such a shame - don't you think? What to do? What to do? I know - Hummingbird Cake! (Insert evil laugh here.) (Wipe drool - sorry.)

This is what is left after 2 days. Actually, less now :D

Hummingbird Cake

So... Grab your 23cm x 30cm roasting pan or 9" x 13" baking pan (as the case may be) and line it with some baking paper while setting the oven to 180C (approx 360F.)
You will need
1 1/2 cups self-raising flour OR 1 1/2 cups plain flour, and 3 tsp baking powder
1 cup brown sugar (I don't press down, but suit yourself)
1/2 tsp cinnamon
1 cup sultanas ('cause - hey! extra fruit!)
3 eggs
3/4 cup melted butter
2 cups mashed bananas (I used 3 really(!) ripe, medium-sized ones)
1/2 cup undrained crushed pineapple

Mix the flour (and baking powder, if needed) sugar, cinnamon, and sultanas, and set aside.
Mix the eggs, butter, banana, and pineapple.
I've found it better to dump the dry onto the wet in this sort of recipe, since you want to be quick with the mixing, and this way you don't get flour hiding at the bottom of the bowl when you pour it into the pan. So mix - pretend it's muffin batter - and pour into your lined pan, then bake at 180C/360F. This took me 30 minutes, but my oven tends to be a little slow, so start checking after 25 minutes.

Cream Cheese Icing

250g cream cheese, softened
80g butter
2 tsp vanilla
500g icing sugar

Mix the cream cheese and butter until smooth, then add the vanilla, then the icing sugar. (I used a icing mixture, but pure icing sugar is fine, and gluten free, as the packet proudly proclaims.) I didn't use all the icing last time I made this, so I still have some left over (threw it into a ziploc bag, and put it in the freezer before I ate it all) but I don't think I would bother next time - it wasn't that much, and it spreads well over the cake.

You should get about 24 serves from this cake - about 5cm x 5cm squares (2" x 2".) Not an overpowering flavour, but very nice.

Thursday, July 9, 2009

Coming Home

We drove into Brisbane today - 110+km, about 90 minutes, each way - so that David could look at some trucks. He wants to get into driving trucks, and already has work lined up for him, so it's just a matter of getting the vehicle. I drove home, as I have done other times, and found myself waiting for one particular moment - the first view of Toowoomba. About 5km east of the Helidon exit, you come around a corner, and, if it's dark enough, you see the lights of northern Toowoomba spread out, and I know that home is finally not that far away. And I smile.